With over 3 billion users, and advanced targeting options available for advertisers, running a lead generation campaign on Facebook can prove extremely lucrative.
This post shows you how.
While Facebook has various ad types available, their lead generation campaigns remain one of the most popular choices, simply because of the ease of use, versatility, and cost-effectiveness they offer.
So where do you start?
Discover exactly how to create a Facebook lead generation campaign, including:
- How lead generation campaigns work on the platform
- The 3-step process for creating your own
- How to get the generated leads into your CRM so you can start following up with them and communicating.
How Do Facebook Lead Generation Campaigns Work?
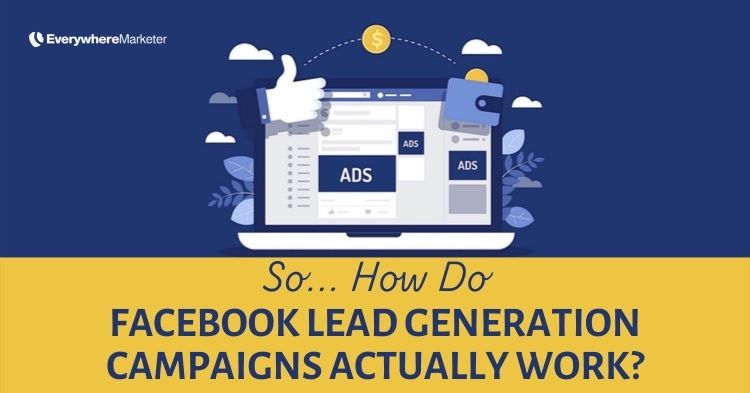 Lead ads are one of the most popular Facebook ad types out there. They used to be restricted just to mobile devices, but are now available on desktop too.
Part of the reason for their popularity is that such ads can achieve relatively high conversion rates. Some of that is to do with the following:
- The Facebook user never has to leave the Facebook platform to take advantage of the ad’s offer, thereby reducing any potential friction…
- Much of the information in the lead form is pre-filled by Facebook—often all the user has to do is simply click the button to sign up.
Here’s how they work...
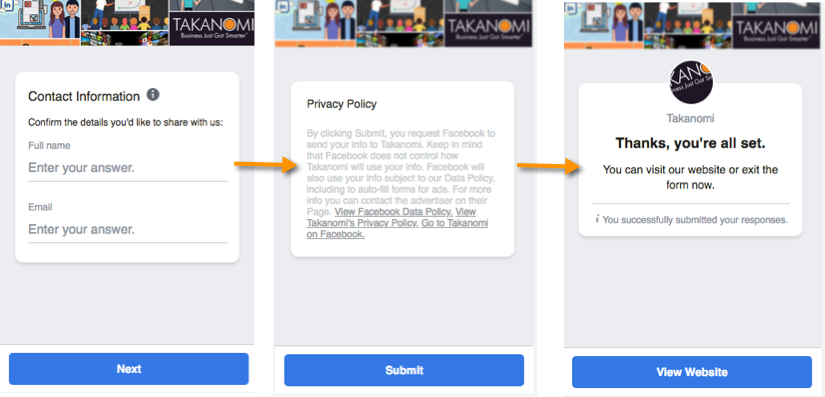
When the user clicks on the ad, they’re presented with a lead form generated by Facebook within the feed.
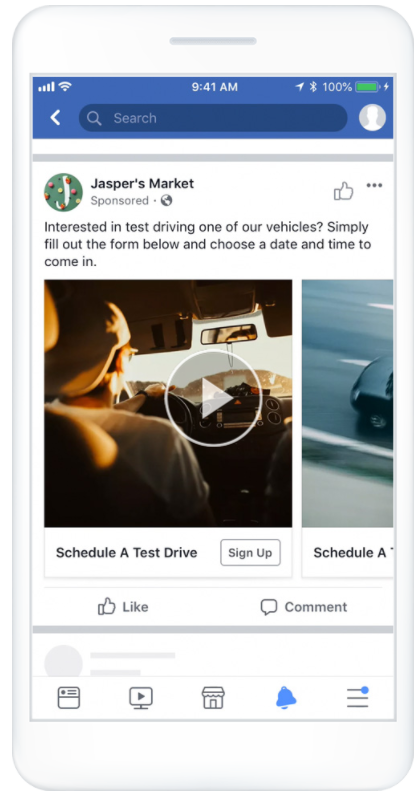
The data you request from the user in your ad is up to you.
Free Custom Lead Gen Campaign Checklist
Grab your free tailored checklist for setting up a powerful Facebook lead generation campaign, perfectly customized to your business—it's 100% FREE!
Just hit the button now—it only takes a few seconds! →
For example, that might include their:
- Name
- Telephone number
- Email address
- Mailing address information
As stated above, depending on what information you request, much of it comes pre-filled by Facebook from the data they already have for the user, making signing up really easy.
Of course, although Facebook lead generation campaigns offer distinct advantages, much of the real power of Facebook’s advertising comes from their targeting, enabling you to target prospects on the platform with incredible precision.
How to Create a Successful Facebook Lead Generation Campaign for Your Business
Here’s how to set everything up. As you’ll see, the process is pretty straightforward.
These are the three main steps involved, as detailed below. These instructions focus on the Ad Center, which provides a simpler approach if you’re just getting started.
As you get more comfortable with setting up campaigns, you can also create them via Facebook’s Ads Manager, which provides more options (such as split testing) and a higher level of control.
Step 1: Create Your Campaign
Access Facebook’s Ad Center via the left panel of the screen from your Facebook Page:
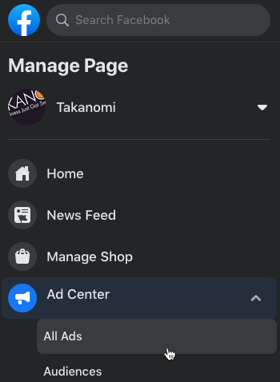
Or similarly find it on the left-hand side of Facebook’s home page:
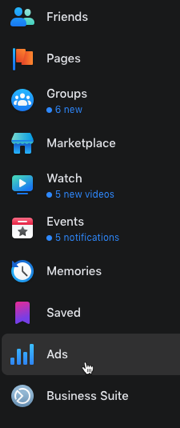
Then click on the Create Ad button.

You’ll then need to click the goal of your new ad. For a lead generation campaign, click the Get More Leads button.
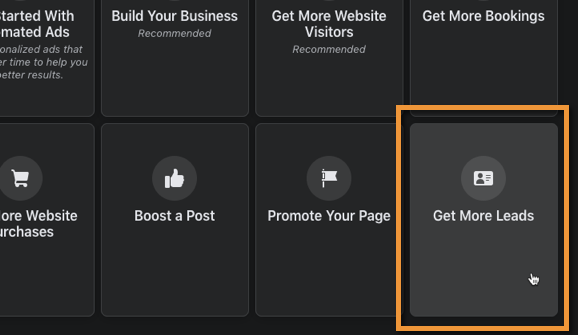
Click the top option to get leads from Facebook itself:
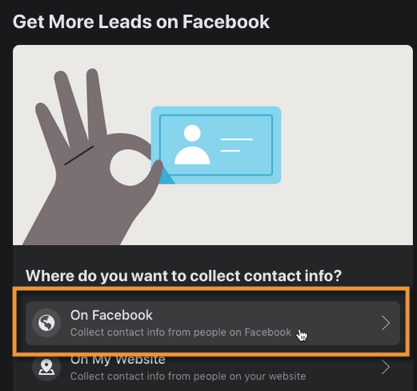
You can then start to set up your ad, which may look something like this after someone clicks on the ad itself:
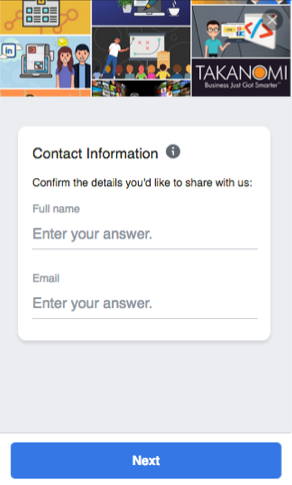
At the top of the ad set up page, you can opt to customise the “form text”.
This is referred to as a Greeting if using the Ads Manager (rather than the Ad Center we’re showing here), and helps contextualise the form for the user, encourage them to fill in the form, and generally improves conversion rates.
So it’s worth filling it in with relevant information, reiterating the benefit for the user from filling in the form.

Next, decide what information you want to collect from the user.
Their full name is provided by default, and the email checkbox comes pre-checked. Other information you can request includes the following:
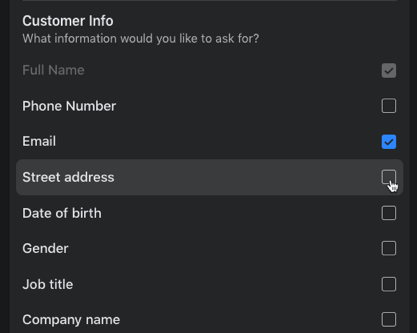
You can also choose to:
- Add a supplementary question—perhaps something specific to your business to help pre-qualify the lead…
- Change the form language if needed from the default…
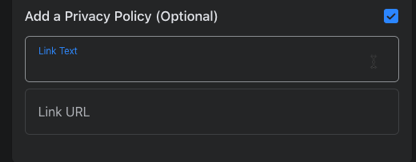
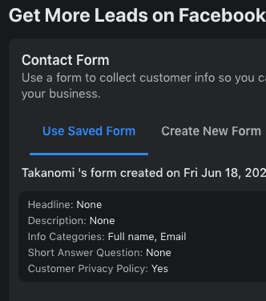
- Add a privacy policy.
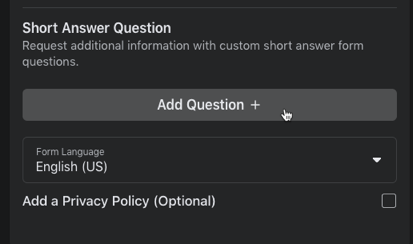
For the privacy policy, you can enter the exact text you want and where you want it to link to (presumably, the privacy policy page on your website).
In terms of the flow of the ad, it will look something like this (again, after the user has clicked the call to action button from the ad itself):
After selecting your lead generation campaign options and clicking Next, you can then create the Ad Creative—in other words, what shows to the Facebook user as they scroll through their feed.

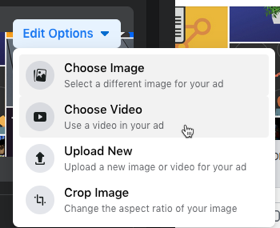
As one of the most important elements, choose an engaging image or video (here’s how to make video content using some of the top tools currently available) for your ad to attract prospects.
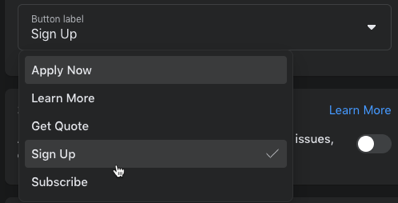
For a lead generation campaign, the available call to action options are as follows:
You can then choose who should see your ad, such as targeting people based on characteristics (such as where they live, income level, age, gender, interests, and so on) or custom audiences you’ve created.
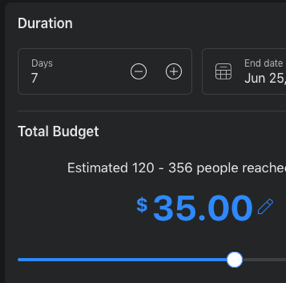
Choose how long you want the ad to run for, and your total budget for that period. Facebook will show you how many people your ad is likely to reach per day based on your settings.
In terms of placement, Facebook will encourage you to place it across all three properties—Facebook, Instagram and Messenger.
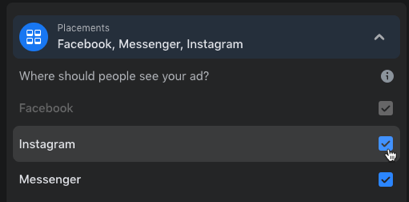
However, these all behave differently, and it’s generally better to restrict ads initially just to Facebook.
Once you’ve run an initial campaign, you can then begin to compare and try to improve your results by experimenting with the other options.
If setting up lead generation campaigns via Facebook’s Ad Manager, you can deselect Facebook and just run on Instagram for example, so you can fine tune campaigns for that platform.

Free Custom Lead Gen Campaign Checklist
Grab your free tailored checklist for setting up a powerful Facebook lead generation campaign, perfectly customized to your business—it's 100% FREE!
Just hit the button now—it only takes a few seconds! →
Step 2: Launch Your Campaign
When you’re ready, submit your payment information if you’re new to Facebook advertising, and click the Promote Now button.

The ad will then start running based on your settings.
Once you’ve ran one or more lead generation campaigns, when going to set up a new one you’ll find you can select from campaigns you’ve ran before, making the setup process potentially quicker and easier by simply selecting and then adjusting a previous campaign as needed.
Step 3: Optimize Your Ad
Those new to Facebook advertising often make the mistake of assuming the initial costs are set in stone.
The truth is that new ads often perform relatively poorly. That means they perhaps give you a higher cost per lead than what the lead is actually worth to your business.
At this point, many newbies walk away, and unfortunately miss out on the real benefits of Facebook advertising.
However, the real magic comes from optimizing your campaign, and reducing the costs (often drastically) by carefully analyzing the results and honing in on subsets of your audience for whom your ad is performing far better.
It means the initial cost per lead for example can often be reduced by 50% or more via the optimization process.
To run a successful Facebook lead generation campaign, you should be prepared to avoid getting too fixated on the initial cost per lead.
Your initial expenditure is largely about collecting enough data so you can start optimizing, and thereby reduce that cost per lead and improve your ROI so you know the campaign is profitable.
Once you know it’s profitable, you can begin to carefully scale up your campaign. But it’s a process and should be seen as a longer-term play (though really not that long!) rather than instant overnight success.
To optimize your lead generation campaigns:
- Find out as much as you can about the leads coming through—using Facebook’s Ads Manager will give you much more detailed information on who exactly is responding to your advertising.
- Adjust your targeting to focus on the characteristics of those leads. For example, if you notice you’re getting a far higher response from leads aged between say 36 and 45, than those aged 26 to 35, you can start targeting your ads accordingly.
How Do You Get Your Leads from Your Campaign?
There are three main ways to get the leads who are signing up via your campaign, as follows.
The first two involve downloading the information from Facebook, which obviously involves some delay before the lead is going to hear from you. To ensure the lead remembers you and doesn’t ‘go cold’ it’s essential to act on them quickly.
The third involves integrating directly with your CRM such as an email campaign service, which means leads can potentially get an immediate response and is far preferable.
Download from Facebook’s Ads Manager
- Go to the Ads Manager
- Click on the Ads tab

- Click on the relevant ad, and in the Results column, click the On-Facebook Leads link.
- Click Download New Leads to download the new leads since your last download—you can also download by a specific date range. Chose the CSV or XLS download option.
Download from Your Facebook Page
- From your Facebook Page, click on Publishing Tools, and then Forms Library
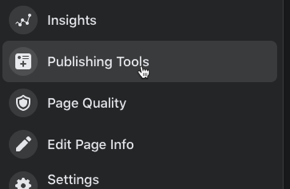
- Select the relevant form and click Download.
- As above, you can choose to Download New Leads with the latest leads since your last download, or download by date range. Again, choose either the CSV or XLS option.
Note that your leads will only be available for download from Facebook for 90 days.
Integrate Your CRM
By far the preferred option wherever possible is to get leads sent directly to your email campaign service, both for ease of use and so that leads are responded to quickly.
To do so, click on Publishing Tools from your Facebook Page (see image above). From there, click on More Tools, and then Instant Forms.
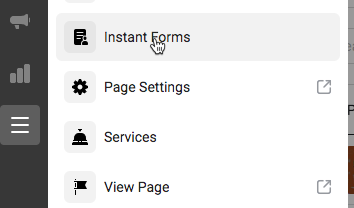
Click the CRM Setup button.

Start typing in the name of your service, such as AWeber, and follow the instructions provided to get leads delivered automatically.
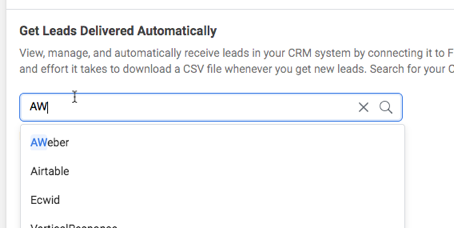
There’s also a fourth way to get your leads, and that’s by integrating with Facebook’s API, though the set up is of course more complicated than those outlined above.
Frequently Asked Questions
How do Facebook lead generation campaigns work?
Facebook lead ads keep users on the platform, pre-filling forms for easy sign-ups while offering high conversion rates.
How can I create a successful Facebook lead generation campaign?
Access Facebook's Ad Center, choose 'Get More Leads,' customize your form text, select lead data, set your budget, and target your audience.
How do I get leads from my Facebook campaign?
Download leads from Facebook's Ads Manager or Page within 90 days, or integrate your CRM for immediate responses and better lead management.
To Conclude
This post has outlined exactly how to set up your own Facebook lead generation campaign, integrated with your CRM, and how to optimize the campaign to maximize your ROI and achieve scalable lead generation.
For many businesses, this type of advertising represents a huge untapped resource through which they can grow, potentially significantly.
So if you’ve not set up a lead gen campaign on Facebook before, start testing the waters—you can do so on a minimal budget—and begin to optimize as you begin to collect data.
Free Custom Lead Gen Campaign Checklist
Grab your free tailored checklist for setting up a powerful Facebook lead generation campaign, perfectly customized to your business—it's 100% FREE!
Just hit the button now—it only takes a few seconds! →
