LinkedIn introduced their Insight Tag back in 2016, enabling advertisers to more easily track conversions.
Before then, it was harder to determine how effective your ads were, and usually meant using your own tracking links.
But, as we'll find out, the Insight Tag does more than track ad conversions.
Through this ultimate guide to LinkedIn's Insight Tag, you’ll discover:
- What the LinkedIn Insight Tag is
- How to install it and check it’s working as it should
- How to use it for more effective advertising, including to create custom audiences, to track conversions, and to gain valuable demographic information about people visiting your website
What Is the LinkedIn Insight Tag?
In brief, the LinkedIn Insight Tag (or pixel) is a bit of code you add to your site that helps you:
- Determine the results of paid ad campaigns on LinkedIn, so they can be optimized accordingly.
- Build audiences you can then retarget—in other words, show ads to people who have taken a certain action on your website.
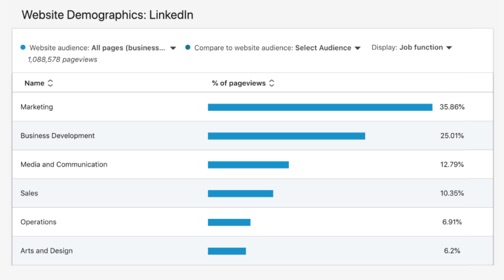
- Learn more about who is visiting your site—by installing the tag, LinkedIn will give you demographic insights.
Adding the tag is completely free. Even if you’re not intending to advertise on the platform just yet, it’s worth doing to:
- Understand more about who is visiting your site to help target your messaging.
- Build audiences to potentially advertise to in future when you’re ready to do so.
LinkedIn Insight Tag Conversion Tracking
As mentioned, the tag helps you track how your LinkedIn ad campaigns are performing, including conversion tracking such as measuring how many leads were created from a campaign.
In other words, you can track how a particular ad led to actions on your website such as someone:
This also includes people who took action after seeing your ad, but didn’t click on it directly.
This is useful for people who have perhaps previously visited your website, or are still on it, and see the ad as a useful memory jolt and return to your website directly, including via a different device.
You'll find out below how to start using the LinkedIn Insight Tag for conversion tracking.
Create Your LinkedIn Insight Tag
Before adding the LinkedIn Insight Tag to your website, you need to create it.
To do so, head to LinkedIn’s Campaign Manager, click on the Account you want to use, and click the button to set up your tag.
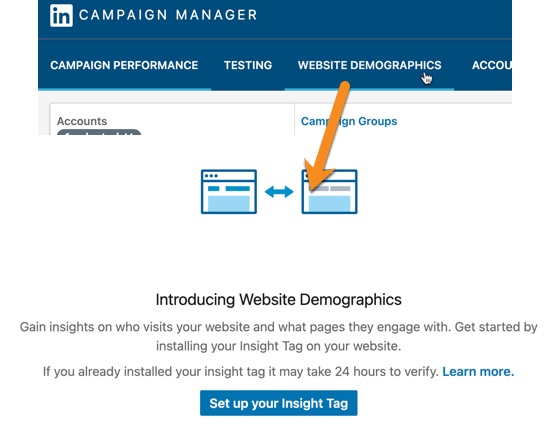
You’ll then be asked to choose how you want to install the tag, so let’s look at that now…
How to Install the LinkedIn Insight Tag
You can either install the tag manually, install it using Google Tag Manager (GTM), or install it in WordPress via an appropriate plugin.
We’ll look at each of these in turn.
Install Manually
If you’re adding the LinkedIn Insight Tag to your site via the raw code, click the top option, ‘I will install the tag myself’ (or the second option if you’re handing it off to a developer).
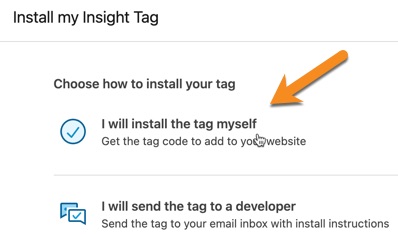
This gives you the code you need to add.
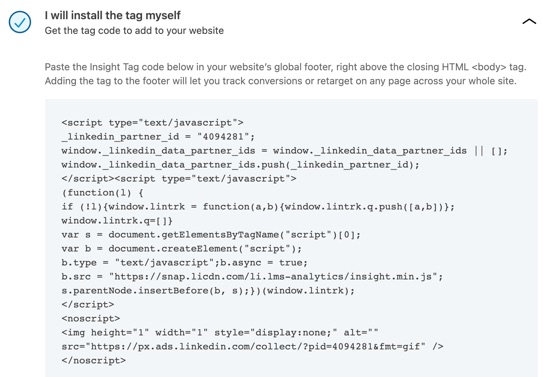
This should be added to the footer of your website.
Your site likely has a common file that’s used as the footer across most of your pages. Open this in your usual code editor, and add the LinkedIn Insight Tag code just above the closing body tag.
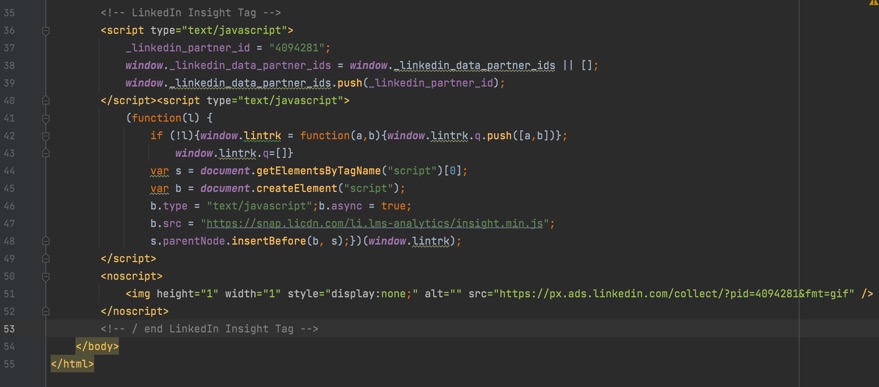
Deploy to your live website in the usual way. Set up conversion tracking on LinkedIn by adding their Insight Tag, and then creating a new conversion via LinkedIn's Campaign Manager.
Set up conversion tracking on LinkedIn by adding their Insight Tag, and then creating a new conversion via LinkedIn's Campaign Manager.Click To Post OnInstall via Google Tag Manager
To install the LinkedIn Insight Tag via Google Tag Manager, click the last option, ‘I will use a tag manager’.
![]()
This will give you the LinkedIn tag ID needed in the next step.
Log into GTM, and click through to your container.
![]()
From the Tags page, click to add a new tag.
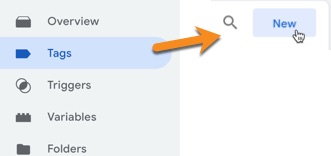
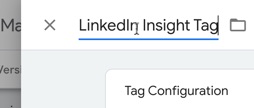
Name the tag LinkedIn Insight Tag or similar for your future reference.
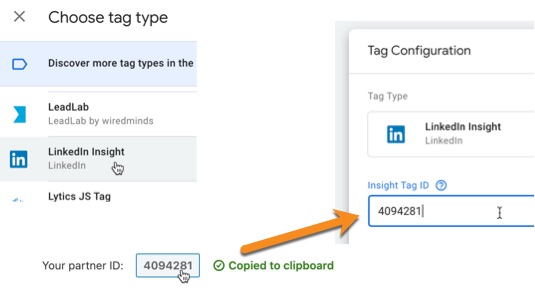
Click to choose the LinkedIn Insight tag type. Then click to copy your LinkedIn partner ID (or tag ID) and paste into the Insight Tag ID box in GTM.
Under Triggering, choose the All Pages trigger.
Save your tag, and you’ll see it appear in the list of tags.
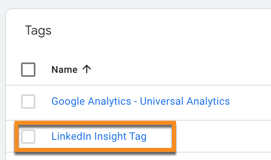
Finally, don’t forget to publish your changes in GTM.
![]()
Install in WordPress
Adding the LinkedIn Insight Tag to WordPress is really straightforward.
First, grab the partner ID in the same way as above for GTM.
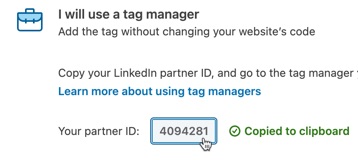
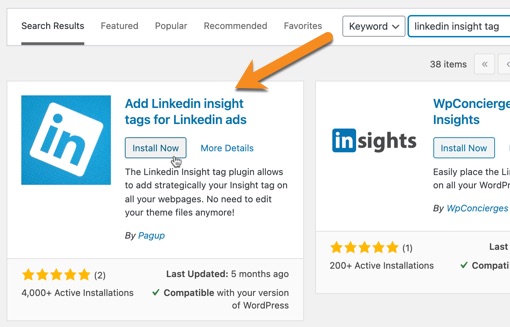
Then from within your WordPress dashboard, click to add a new plugin, and search for linkedin insight tag.
Click to install the top one (from Pagup) as shown:
Click to activate the plugin, then click the switch provided to enable the LinkedIn Insight Tag, and paste in your partner ID.
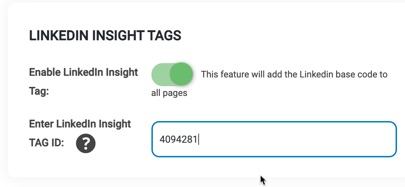
Click to save the changes, and that’s it.
Verification: How to Check Your LinkedIn Insight Tag is Working
How can you check if the tag is working okay and able to collect data?
Check back on the Website Demographics page (see above) within LinkedIn after 24 hours or so, and you should see something like the following to confirm the tag has been verified.
This means it’s working okay.
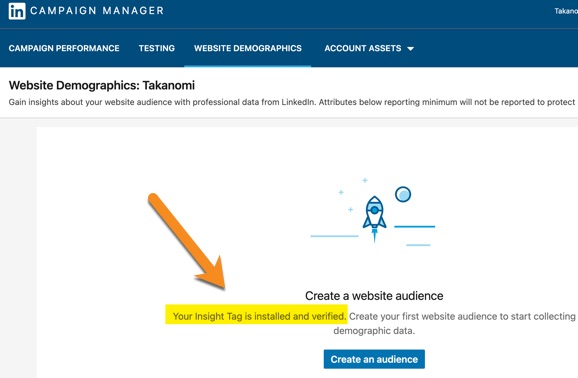
However, before it starts to collect demographic information, you need to create your first website audience—see the section below for info on how to do this.
What If the LinkedIn Insight Tag Is Not Working?
If, after 24 hours, your LinkedIn Insight Tag is not showing as verified, do the following:
- Double check you have selected the right account in LinkedIn, matching the pixel you’ve installed.
- Run through the relevant steps above again to install the tag, ensuring the code matches what LinkedIn has supplied or that you’re otherwise using the correct information.
- If you have installed the tag via Google Tag Manager, ensure that you have submitted and published the changes, otherwise the pixel won’t show on your site.
- Once you’ve corrected any issue that might have stopped it working, leave another 24 hours or so before checking again.
Create a Website Audience to Start Collecting Demographic Data
Before the LinkedIn Insight Tag starts collecting any data, you first need to create an audience.
Click the button provided from the Website Demographics page in LinkedIn’s Campaign Manager.

To create an audience of all visitors to your website:
- Name the audience All pages
- Under the URL targeting, change it to match a URL that contains, and then enter your domain name.
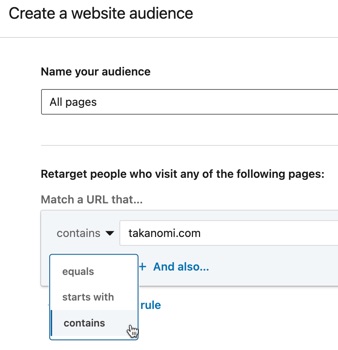
- Click the Create button—your new audience will then be listed.
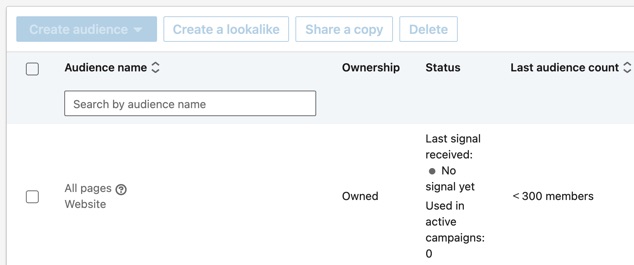
- Check back after 24 hours or so, and you should start to see data coming through.
While the audience created in the example above is useful for the overall demographic insights it will give you, in terms of advertising, it's a little broad.
Consider creating additional audiences you can target based on actions on your website, such as:
Before starting to advertise however, it’s essential to to first set up conversion tracking using the LinkedIn Insight Tag.
Here’s how…
How to Use Your LinkedIn Insight Tag for Conversion Tracking
Of course, you need to be able to track the effectiveness of your LinkedIn advertising to help determine whether it’s working, and to be able to optimize it.
To do so, navigate to the Conversion Tracking page in LinkedIn.
![]()
Click to create a new conversion.
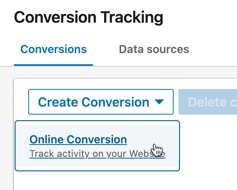
Start filling in the details requested, including:
- The name of the conversion for your reference
- The type of behavior you want to track—for example, to track a customer, you would select Sales > Purchase from the list. Note you can also track things like when someone starts to checkout, when they add their billing information, and so on.
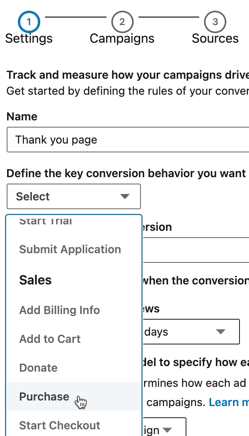
- The value of that conversion for your business.
- The timeframe for when the conversion can be counted (after clicking through on or seeing your ad).
- The attribution model.
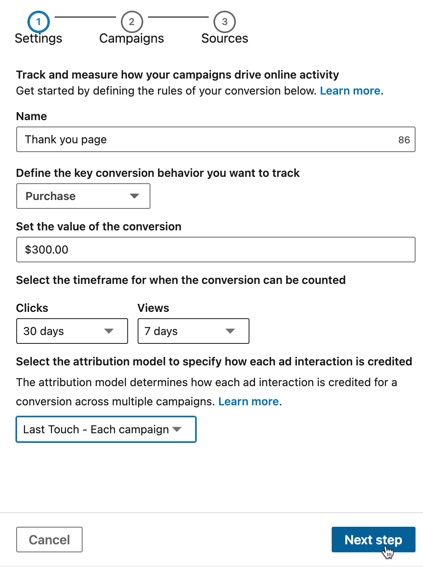
Click to move to the next step.
If you’ve yet to add a relevant advertising campaign, ignore the Campaigns page, and click the Next step button again for the final Sources page.
This is where you tell LinkedIn how to recognize a conversion, and is where your Insight Tag comes in—essentially, it can track when a visitor reaches a particular page on your website.
Provide the details of the page in question, and click Create.
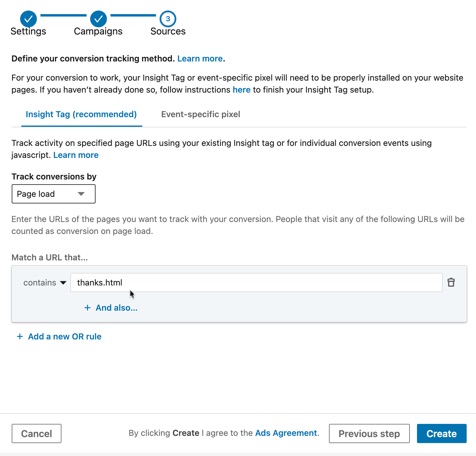
You may have noticed that the Sources page also has an Event-specific pixel tab.
Sometimes you want to track specific events on your website that may not correlate with someone visiting a particular page.
For example, you may have a dynamic opt-in form where someone can opt in but the page’s URL never changes.
How do you track this kind of event-specific conversion?
Track Event Conversions with the LinkedIn Insight Tag
Using the event-specific pixel is no longer recommended, instead you can track events too via the LinkedIn Insight Tag.
First, check that enhanced conversion tracking is enabled for the tag. For new tags, this should be turned on automatically.
To check:
- After ensuring you have the right account selected, click Account Assets > Conversion Tracking from the Campaign Manager menu

- Click the Manage Insight Tag button top right, and then Settings.
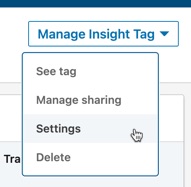
- If the Enable enhanced conversion tracking checkbox isn’t on, turn it on and click Save

Then, when creating a conversion, select the Event option instead of the default Page load option in the ‘Track conversions by’ dropdown.
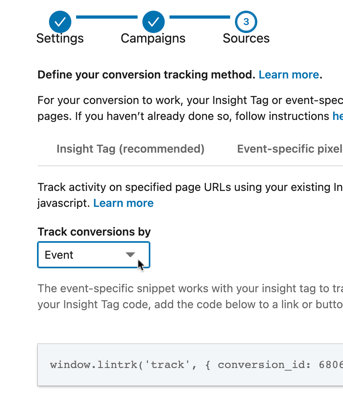
This provides you with a Javascript snippet to add to your page. Ask your developer to make sure it fires only when the required action that you want to track actually occurs.
This can be achieved via Google Tag Manager, or via bespoke Javascript code on your website.
Track event conversions via the LinkedIn Insight Tag by adding the Javascript snippet they give you to your page, firing it when the event happens.Click To Post OnCan You Install Multiple LinkedIn Insight Tags?
There’s the odd comment online that suggests this might be supported by LinkedIn, but in practice it doesn’t appear to be.
This was tested by installing two different Insight Tags, for two different LinkedIn accounts, in the same way via Google Tag Manager.
On checking back in LinkedIn after a couple of days, only one of them was receiving data. The other showed it had yet to received a signal.
Frequently Asked Questions
What is the LinkedIn Insight Tag?
It's a code snippet for tracking ad campaign results, building retargeting audiences, and gathering visitor demographics on LinkedIn.
How do I install the LinkedIn Insight Tag?
You can install it manually by adding the provided code to your site's footer, via Google Tag Manager, or in WordPress using a plugin.
How can I verify if my LinkedIn Insight Tag is working?
Check the Website Demographics page on LinkedIn after 24 hours to confirm the tag is collecting data; create your first website audience to start collecting demographic insights.
How do I use the LinkedIn Insight Tag for conversion tracking?
Navigate to LinkedIn's Conversion Tracking page, create a new conversion specifying details like behavior, value, timeframe, and attribution model; set up the Insight Tag to track specific events.
Can I install multiple LinkedIn Insight Tags on my website?
No, LinkedIn does not support installing multiple Insight Tags for different accounts—it's limited to one tag per website.
To Conclude
With this ultimate guide to the LinkedIn Insight Tag to hand, you can now create, install and use such a tag in your own advertising with confidence.
Even if you’re not ready to advertise just yet, install the tag anyway to learn useful insights about the demographics of who’s visiting your website.

