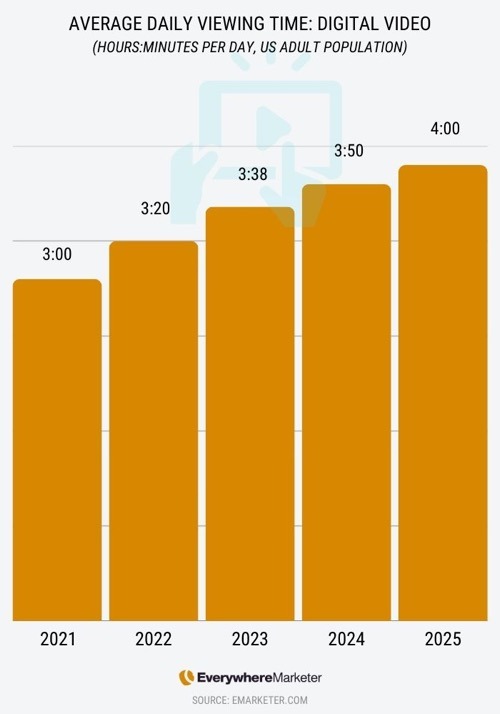
The popularity of video content continues to grow, with the average time spent watching digital video up to 4 hours a day.
For getting your message in front of customers, video is more important than ever.
And a key component of that is having a YouTube channel you can grow to reach whole new audiences.
If you don't yet have a YouTube channel, it's not too late.
This post shows you exactly how to set up a YouTube channel for your business, in just 5 easy steps...
1. Create a New YouTube Channel
Sign into Google if you’re not already.
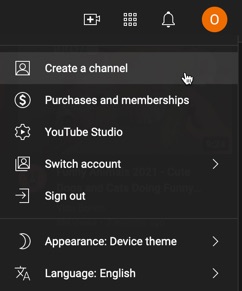
Go to YouTube.com, click your profile pic on the top right, and click on Create a channel from the dropdown menu.
Enter the name you want to appear for your channel and click Create channel.
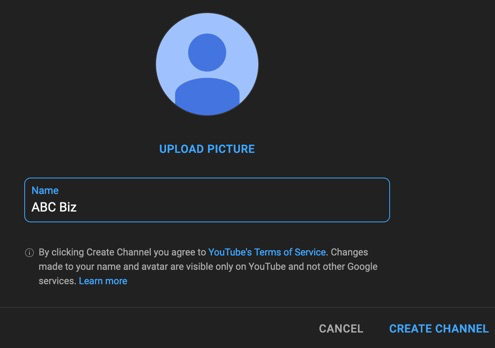
Note that rather than using your straight business name, you may wish to use a name that reflects the type of content you plan on sharing through your channel, and that contains keywords relevant to your intended audience.
Consider using a name for your YouTube channel that reflects the type of content you'll be sharing, and contains one or more relevant keywords.Click To Post OnYou’re setting up your channel for a business, so ignore the Upload Picture bit for now (unless you really want to!). As you’ll see shortly, there’s a different mechanism involved.
2. Move Your Channel to a Brand Account
This is where you specifically set up your YouTube channel for a business, rather than a personal YouTube channel.
A brand account gives you specific advantages, including the ability to:
- Let other people help manage your YouTube channel.
- Stop viewers from seeing your name (or email address).
Create a brand account by clicking through to Settings from the profile menu, and then click to create (another!) new channel:
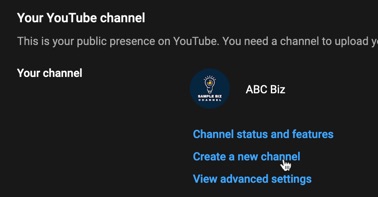
Enter your YouTube channel name again, click the checkbox to agree to the statement, and click Create.
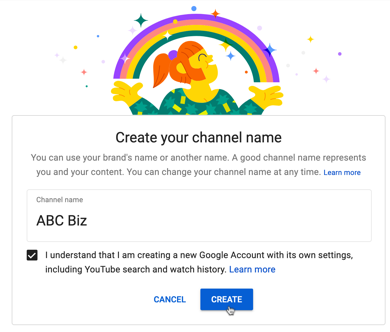
3. Customize Your Channel for Your Business
Now that you’ve set up a basic YouTube channel for your business, it’s time to customize it.
Start by clicking the Customize channel button from your YouTube channel page.

This takes you to YouTube Studio.
Customize Your Branding
Click through to the Branding tab from the top. This is where you can customize your profile picture (or channel logo), and the banner image that shows across the top of your channel.
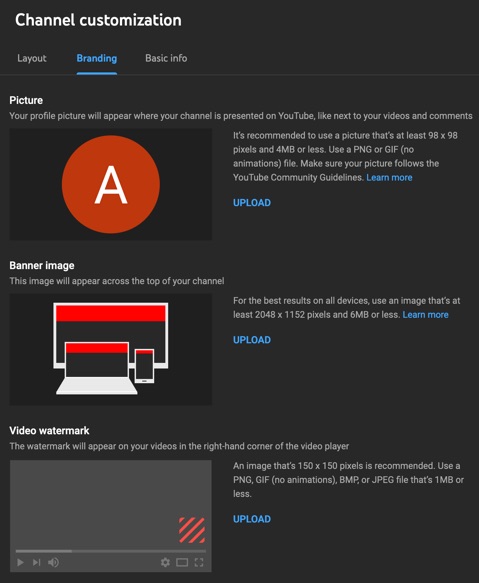
For your profile picture, the ideal size of the image is 800 x 800 pixels (minimum size is 98 x 98 pixels). If you don’t yet have a suitable image, Canva has a number of templates available that you can adjust as needed.
You can always just use something temporarily for now, and swap it out later.
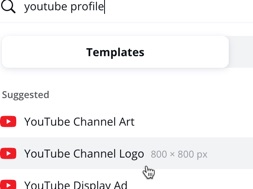
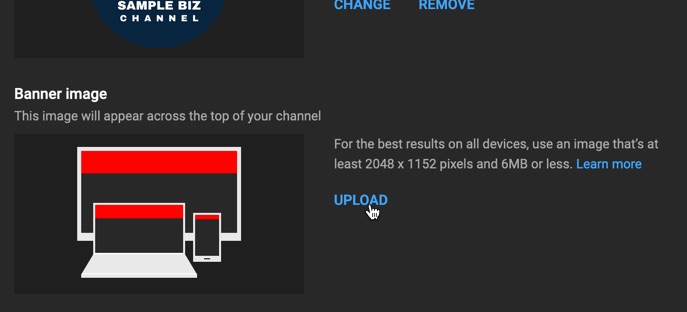
Next, click to upload your banner image.
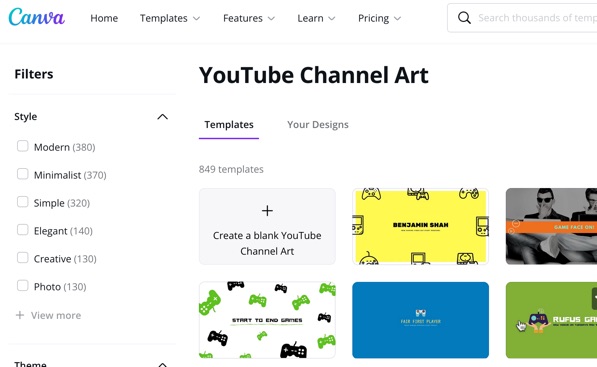
Again, if you don’t yet have one, it’s easy to create one in Canva, with well over 800 ‘YouTube Channel Art’ templates available.
Your banner image should be at least 2048 x 1152 pixels, with the ideal size 2560 x 1440 pixels (the default size of Canva Channel Art templates).
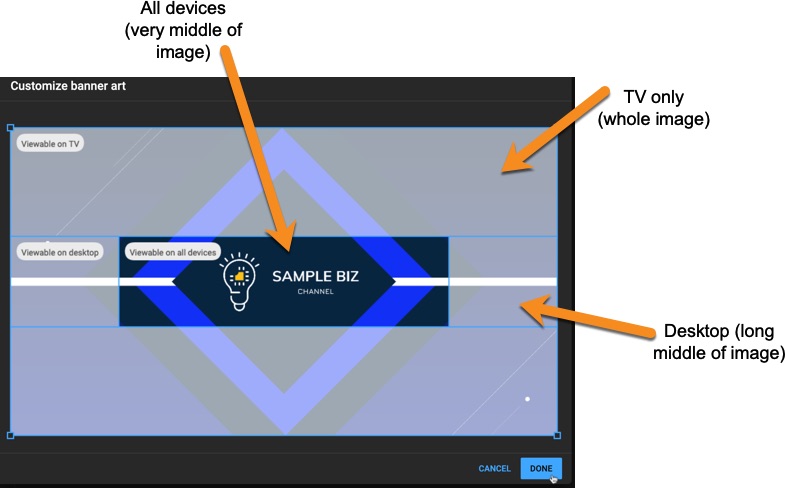
The banner image will be shown differently depending on the device used, with only the largest version of the image shown on TVs. As you can see from the following, all the important information should be in the very middle of the canvas.
You can also optionally upload a video watermark for your channel, which will then appear on your videos.
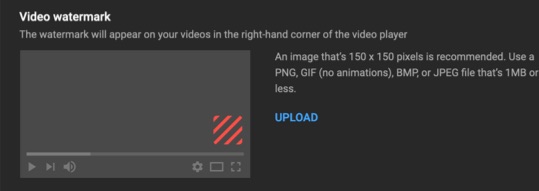
This should be 150 x 150 pixels.
As discussed in our post on how to grow your subscribers on YouTube, you can potentially use an image that looks like a YouTube subscribe button. On hovering over the button, viewers will see an actual subscribe button they can use to follow your channel.
Add Basic Info About Your Channel
Next, click through on the Basic Info tab.
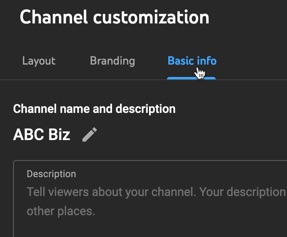
The info you enter here shows up on the About page for your channel, in search results and in other places.
Enter a paragraph or so that helps describe your channel and the content you intend to offer.
With your channel just getting started, don’t spend too much time worrying about what to write. Just put some basic information there for now (include some keywords to help attract your target market if you can), and then return to refine it as your channel begins to get more established.
You’ll also see on this page your channel URL that you can for example use to link to your channel from social media, your website, the bottom of emails and elsewhere to help attract subscribers.

To start with, this will just have a random mix of letters and numbers at the end. Once you have attracted a minimum of 100 subscribers, you’ll be able to change this to a custom channel URL that better reflects your business.
youtube.com/yourcustomname
For example, at EverywhereMarketer, our custom URL is:
(For a custom URL, your channel also needs to be at least 30 days old, and have the profile pic and banner image referred to above).
To get a custom channel URL for your YouTube channel, your channel needs to be at least 30 days old with 100 subscribers minimum.Click To Post OnThe Basic info page is also where you can add links to sites you’d like your viewers to visit.

Add links to:
- Your website
- Your social media profiles
- Other content platforms where you publish content.
When entering a link, you also set the text you want to be shown in the link.

Put your most important links first. You can then choose how many links you want to display on your YouTube channel’s banner.
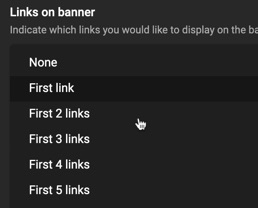
Finally, you can set an email to be displayed (via your About page) so that viewers can get in touch with you.

Customize Your Channel's Layout
Although this is the first tab shown in YouTube Studio when customizing your channel, we’ve left it until last as it includes elements you’ll likely want to return to once the initial channel set up is complete.
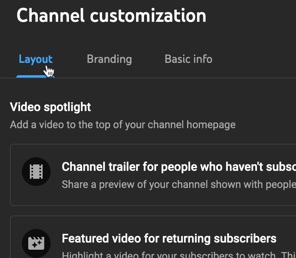
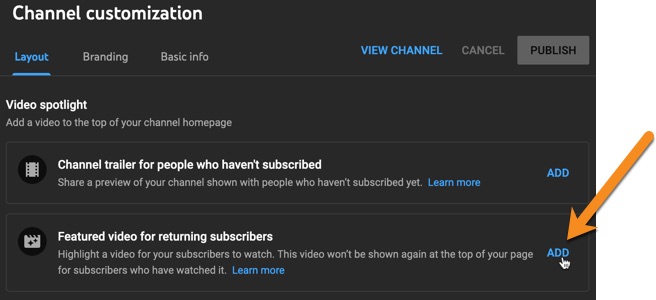
This includes a Channel trailer for people who haven’t subscribed, and a Featured video for returning subscribers.
If you have those assets available, by all means add them now, but otherwise plan to add them over the next few weeks to help optimize your channel.
The Layout page is also where you can customize the layout with up to 12 different sections for your YouTube channel.
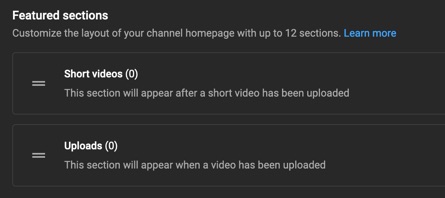
However, it’s only relevant once your channel is more established with a good number of videos available. So make a mental note to return to this section after a few weeks or months.
Once you’re happy with all the information you’ve entered so far, don’t forget to save it by clicking the Publish button (top right).
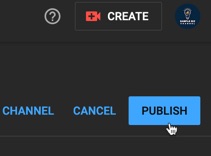
After saving, click the link provided to view your channel and check how it looks.

4. Add Managers to Your Channel
Next, considering it’s a YouTube channel for business purposes, you’ll likely want to assign one or more other people to help manage it.
Do this from the YouTube account page.

Click the Add or remove managers link, and click the Manage Permissions button.
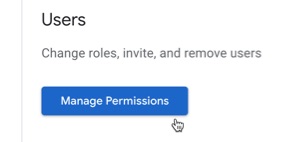
Click the icon to invite new users, and enter the names or email addresses of people you want to add. Select the Manager option under the Choose a role dropdown.
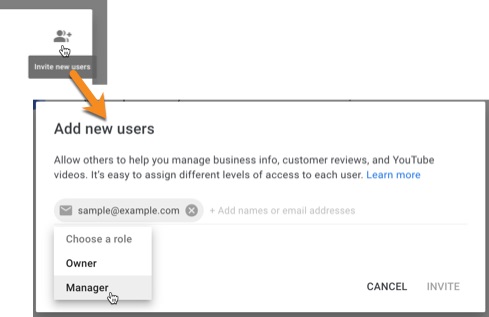
Managers have access to most facilities within your YouTube channel, other than controlling who can manage it (or changing who owns it!).
In other words, they can do things like updating your profile image and banner, editing your description, posting videos and so on.
5. Start Promoting Your Channel
You’ve now taken care of all the basic steps for creating a YouTube channel for your business.
Now it's time to get the word out.
Here's how...
a. Start Posting Videos
Until you start posting some videos, your channel will be largely invisible on YouTube, and there’s little point in linking to it from elsewhere until you actually have some content for people to view.
So yes, the first step is to actually start posting some content to your channel so visitors have something to look at, and so that your content can begin to rank, both on YouTube as well as potentially on Google.
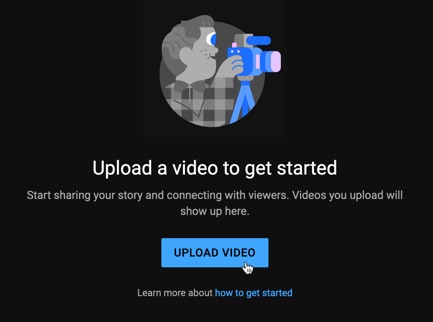
If you already publish content via a blog, one of the easiest ways to start producing video content is to repurpose some of your existing posts into video form.
Once you have a YouTube channel for your business, post new videos regularly. Already blog regularly? Get them repurposed into videos every time you publish.Click To Post OnAnd if you’re unsure how to make video content, here are some tools that can help.
If you’re already creating video content, such as via Facebook Live, such videos can be repurposed by posting to YouTube.
Otherwise, start by doing some keyword research to find out what people in your target market are looking for, and create content to suit.
Here's a full guide on optimizing videos for YouTube effectively, with four key steps to follow.
You can also watch the following quick summary:
b. Add a Channel Trailer to Encourage Subscribers
As people start visiting your channel page, you want to do everything you can to encourage them to subscribe.
As briefly mentioned earlier, YouTube lets you set a specific video to show to visitors who haven’t yet subscribed, referred to as a Channel trailer.
Here’s a channel trailer for an entertainment channel: 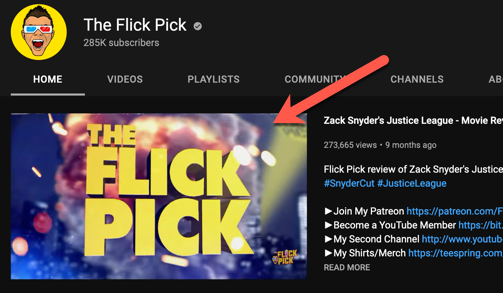
Remember, you can add your Channel trailer via the Layout tab on the Customization page within YouTube Studio.

c. Link to Your Channel From Elsewhere
One of your priorities should be to start growing subscribers for your channel.
An initial way to help do that is to link to your channel from where you have existing audiences, encouraging people to subscribe.
Options include:
- Your blog
- Your social media profiles
- Your profiles on third-party content sites like Medium and Quora
- Email signatures, both in broadcast and drip campaign emails, and other emails sent out from your business, such as employee emails and those sent via customer support
d. Keep a Consistent Posting Schedule
Once you have a YouTube channel for your business, it’s important to keep posting regularly to keep subscribers engaged and maximize your visibility on this huge platform.
As mentioned above, if you’re already publishing blog content, get these consistently repurposed into video form (and then embed those back into the relevant blog posts for SEO and other benefits, see (e) below).
Otherwise, create a content calendar for new video content that your business can stick to consistently.
e. Integrate Your Videos Elsewhere
Your visibility on YouTube, subscriber growth, and general viewing figures for your videos will all improve significantly when you start integrating your videos elsewhere.
Options include embedding your videos:
- Back into relevant blog content as previously mentioned.
- Into relevant content you’ve published on third-party platforms, such as in LinkedIn articles and Medium stories.
f. Maximize Subscriber Growth
Follow our 5-point plan to grow subscribers on YouTube:
- Create videos designed to maximize subscriber growth
- Optimize your videos for search and subscriber growth
- Optimize your channel
- Promote your videos
- Promote your channel.
Take a look at the full guide to ensure you have these taken care of in the right way to maximize the value of your published videos.
Here's a quick summary of the info you might want to look at first:
g. Assign a Video as Your Featured Video
Finally, as your subscribers grow along with the number of videos on your channel, you may have a specific video you want to feature for your subscribers.
In a similar way to adding your Channel trailer (see (b) above), do this from the Layout tab when customizing your channel in YouTube Studio.
Also, check out this guide on YouTube channel optimization, including 10 ways to grow views and subscribers.
Frequently Asked Questions
How can I create a new YouTube channel for my business?
Sign into Google, go to YouTube, click your profile pic, and choose 'Create a channel' from the dropdown menu.
Why should I use a brand account for my YouTube channel?
A brand account allows others to manage your channel and keeps your personal details private.
What size should my YouTube channel logo and banner image be?
The profile picture should be 800 x 800 pixels, and the banner image should be at least 2048 x 1152 pixels.
How do I add managers to my YouTube channel for business?
Go to your YouTube account page, click to manage permissions, invite new users, and assign them the 'Manager' role.
What are some ways to promote my YouTube channel?
Start posting videos, add a channel trailer, link to your channel from other platforms, maintain a consistent posting schedule, and integrate videos into your content.
To Conclude
So that’s a comprehensive guide on how to set up a YouTube channel for your business, including what to do to attract subscribers and maximize the growth of your channel.
If you don’t plan on doing so right away, bookmark this post so you have it to refer back to.
