Approaching A/B testing in WordPress can be a challenge.
Testing one page against another may be straightforward enough... but what if you want to test the headline of a post?
Or test different product titles and descriptions for a WooCommerce site?
Don’t worry, we’ve got you covered, with everything you need to know on how to run A/B tests in WordPress.
We’ll cover:
- What A/B testing actually is
- An easy way to double your results with split tests
- Five top tools for conducting A/B tests on WordPress, what they’re suitable for, and how to use them!
Let’s go…
What Is A/B Testing?
In brief, A/B testing is where you test one version of a marketing piece against another in order to see which gives you the best results.
The original version is called the control, with the new version to test against it known usually as the variation.
You can have more than one variation, but it requires a lot more data to get a conclusive result. Normally you’ll want to stick to testing just one version against another.
It’s best to change just one element at a time (e.g. the headline).
If you change more than one, you might miss a potentially significant ‘win’ because a change to one element may give you an improvement, while a change to another negates it.
When used online (and certainly in reference to WordPress), it usually involves testing different versions of a web page, but may also relate to testing different:
With A/B testing (also referred to as split testing), you can dramatically increase results because you’re scientifically testing what people in your market actually respond to, rather than what you assume is going to work well.
But to be scientifically valid and be sure that one version used in a test is better than the other you need to ensure you have enough data to have achieved statistical significance.
Without statistical significance, it’s easy to misjudge the early results and assume there’s a clear winner, when in fact the result can easily be overturned once additional data has come through.
The Easy Way to Double Results with A/B Testing
To double results from your marketing, you only need a couple of tests to improve results by 30%, and a further test that gives you a 20% improvement.
Not every test is going to get these kinds of results (and, yes, some will fail completely).
But it’s not difficult to do either. In fact, percentages like these—and higher—are fairly typical.
- While these 30%-30%-20% percentages add up to 80% at face value, thanks to the compounding nature of split testing, the overall improvement is actually 100%.
That means your results have doubled.
In other words:
- Your initial test gives you a 30% improvement, which you then roll out as the new control.
- A further test gives you another 30% improvement, building on the previous improvement—so now starting to compound your results.
- Finally, another 20% improvement builds on the previous two tests, and results in an overall doubling of your original results before you started testing.
Tools for A/B Testing on WordPress
So, how do you approach A/B testing on WordPress?
On one level, you can approach straightforward page-vs-page testing on a WordPress like any other site. You have two versions of a page, split the traffic equally between both, and then measure your results.
The first two tools below—Google Optimize and VWO—can help with this.
But it can get more complicated on WordPress when you want to test elements such as:
Sometimes you need an A/B testing tool that's been specifically designed for WordPress. We review just such a tool below, as well as a couple other WordPress testing plugins for sites built in a certain way.
1. Google Optimize
Google Optimize is free to use but more suitable for the technically aware, so you may need your developer to help set up tests.
The tool is structured as follows:
- You can have multiple ‘accounts’ within the tool—an account is designed to map to a particular business (e.g. web developers and agencies may manage multiple businesses through a single account).
- Each account can have multiple ‘containers’—a container will map to a specific website.
- On the free level, each container can have up to 5 ‘experiences’ running at the same time—an experience is where you set up and run your A/B test.
To get started:
- Make sure you’re using the Chrome browser, as part of the set up involves a specific Chrome browser plugin.
- Create an account.

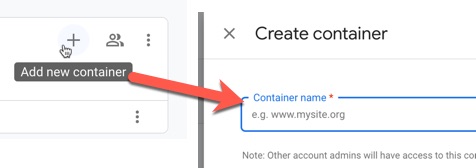
- Create a container.
- Click on the container, and create an experience. Keep the A/B test option selected, or alternatively select Redirect test which allows you to test with two separate pages.
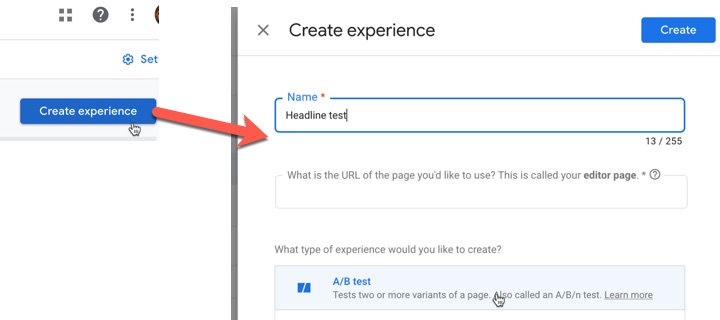
We’ll assume here you selected A/B test.
The URL you enter above (the editor page) is your ‘control’. You’ll next create a variant.
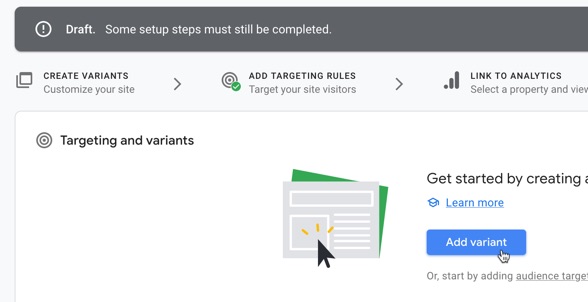
Click the Add variant button, and enter a name—’Variant 1’ is fine.
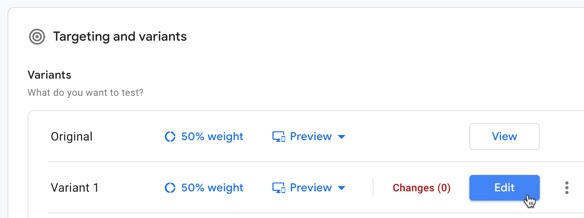
Then click Edit to open your editor page within Optimize.
You’ll then notice you can select different elements on the page and see options to make changes to them, such as editing text, removing elements, editing the HTML, running JavaScript, and even inserting new HTML.
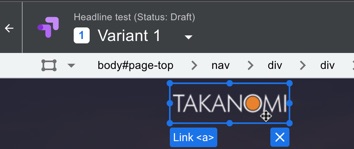
Google Optimize takes care of this dynamically, using scripting behind the scenes to make the required changes for certain visitors to your website.
It’s beyond the scope of this post to go into this in detail, but your developer will be able to assist.
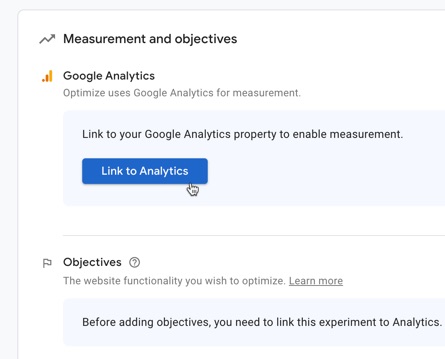
To measure results, you’ll need to link up with your Google Analytics account. Once done, you can then select the objective you’re aiming to improve, based on a goal you have set up in Google Analytics.
Once your test is running, check back regularly to see your results. Google will also let you know if and when your test has reached a conclusive result, as well as provide analytics on the improvement achieved.
The test shown here led to an improved conversion rate of at least 20%. 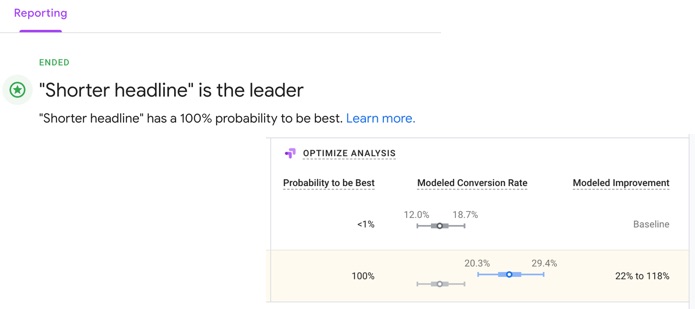
Finally, for any of this to work, you’ll need to ensure that Optimize is installed on your website. Google provides info on how to do this here which your developer should be able to take care of for you.
2. VWO
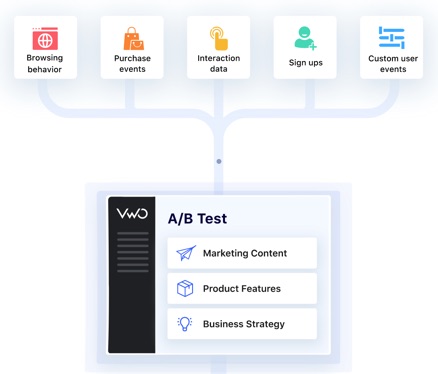
Another option, suitable for the less technically-minded, is VWO (known years ago as Virtual Website Optimizer).
It permits different types of testing:
- A/B testing
- Multivariate testing (in other words, testing combinations of changes on the page at the same time)
- Split URL testing (so directing traffic between different test pages)
Unlike Google Optimize, there’s no permanent free option, but you can trial the service for 14 days (at the time of writing).
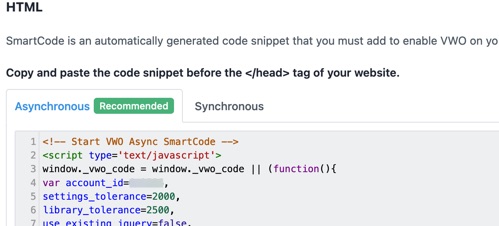
To start, you’ll need to install their code snippet onto your WordPress website so it appears in the head tag of each page.
A plugin such as Head, Footer and Post Injections will help you do this.
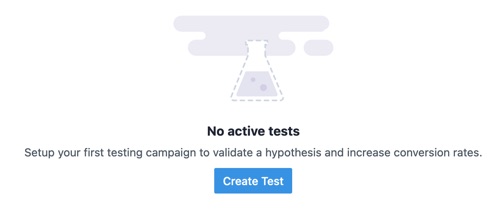
To set up a test, click the Create Test button provided.
You’ll be asked to enter the URL of the page you want to test and select (or first add) the hypothesis you want to test.
A hypothesis is essentially where you state a theory that making a particular change will give you a particular result.
For example, a shorter headline on my landing page will result in more lead conversions.
In VWO, this is stated in terms of the following language:
I expect that [solution] will address [problem]
I expect that a shorter headline on my landing page will address lower than desired conversion rates 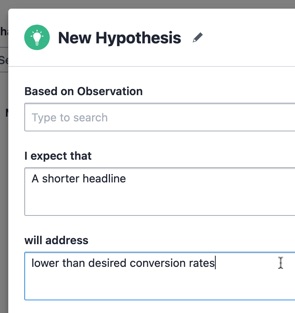
You can then set scores such as:
- Your confidence level at achieving the desired result
- The importance of the test for your business goals
- The ease with which the test can be implemented.
However, no fields other than the two above are required.
After clicking Next, VWO will then open your WordPress site and you’ll be able to create the required variation directly on the page, similar to Google Optimize above.
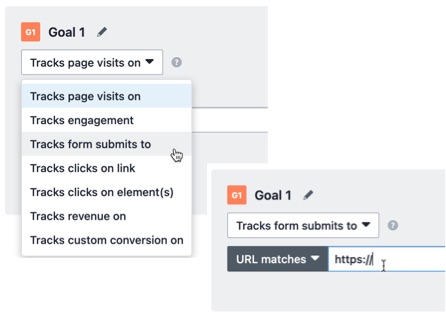
On the Goals page, add one or more goals that you want to track for the test. VWO will keep a record of each time a goal is achieved, enabling you to see which version of the page in the test performed the best.
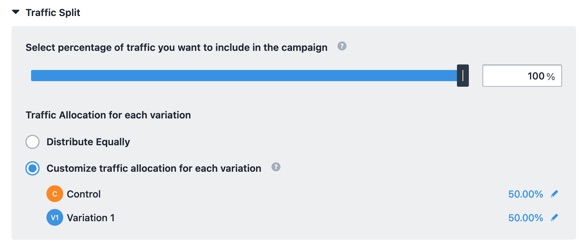
Finally, you can select the percentage of traffic to include in the test, and choose whether to distribute that equally or customize how much traffic each variation receives.
There are also various advanced options available, including (depending on your account level) the ability to enable heatmaps so you can see how people are interacting with the page.
As you can see from the above, for many people VWO will be easier to set up and manage than Google Optimize.
Google Optimize can run most tests on WordPress but is more technical. Alternatively, VWO is easier to get started but requires a monthly fee.Click To Post OnHowever, it is a paid service. While no pricing information is available on the website, research suggests it starts at USD$199 per month for 10,000 users.
3. Nelio AB Testing

Nelio is a powerful, well-regarded plugin for A/B testing on WordPress, with an almost 5-star rating.
It’s free for up to 500 page views a month (including the user of heatmaps), with paid options available starting at USD$29 a month at the time of writing, depending on the monthly view cap and features required.
It’s a particular advantage if you’re running an ecommerce site on WordPress via WooCommerce, enabling you to test different product names, images and descriptions, using order numbers as the conversion action that enables you to judge the result of your A/B testing.
But it works for the more typical WordPress website too, enabling you to test specific things in WordPress that tools like Google Optimize and VWO don’t cater for, such as:
In addition, you can test:
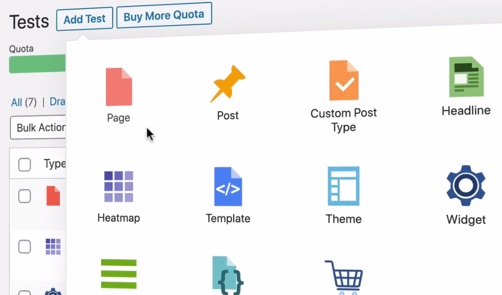
Source: All the images in this section are taken from Nelio’s intro video about their plugin.
Rather than needing to log into a separate third-party website to see your test results and track progress, it’s all done directly from your WordPress dashboard.
So to start a test, you just go to the plugin’s page within your dashboard as you would for any other plugin.
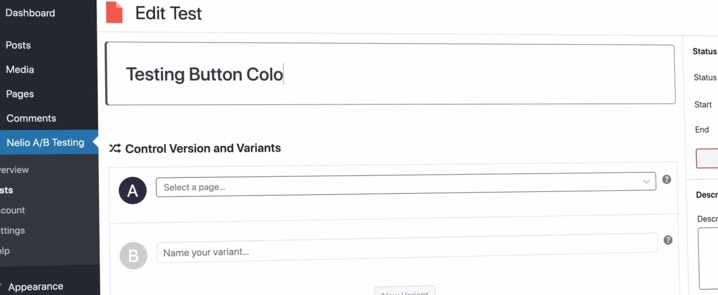
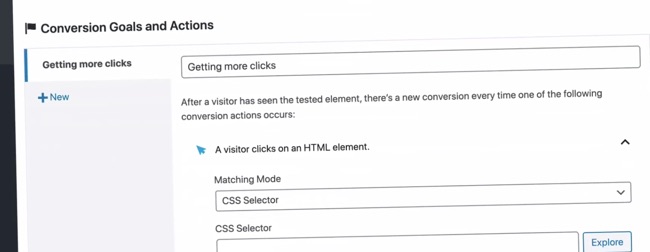
You then set your conversion goals and actions, which Nelio then measures against your visitor numbers to determine your test results.
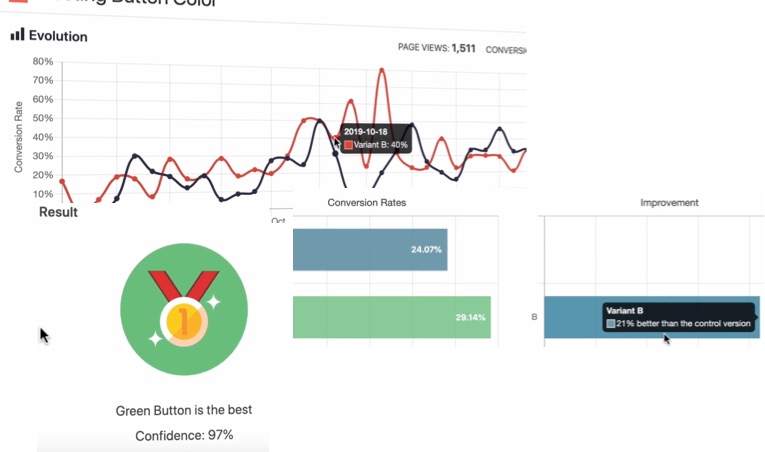
As the test progresses, you’ll see the results presented via relevant charts and graphs, with Nelio advising on the improvement achieved by a particular variation, and its confidence level in a particular result.
You can also see heatmaps about how users are interacting with your website, such as where they are moving or clicking the mouse, and their scrolling level on different pages.

When you’ve found a winner and want to apply the result to your website, click the Apply button provided. You can then move onto testing something else.
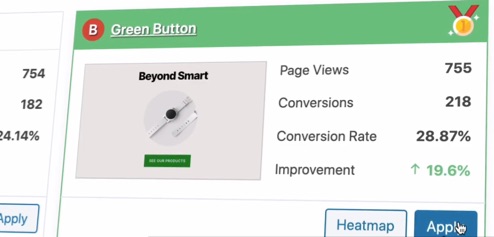
In general, Nelio’s A/B Testing plugin provides everything you need for effective A/B testing, but specifically designed for WordPress.
Nelio AB Testing is a powerful WordPress split testing tool, allowing you to test nearly everything in WordPress that other testing tools don't cater for.Click To Post OnIt comes at a lower cost than VWO (and Google Optimize’s paid enterprise level), with easy setup and management from inside your WordPress dashboard.
The above are the three main tools available for A/B testing on WordPress.
Let’s just quickly summarize another couple of WordPress plugins that also allow you to A/B test, but only if your site also uses the specific visual page builder tool indicated below for each one.
4. Thrive Optimize
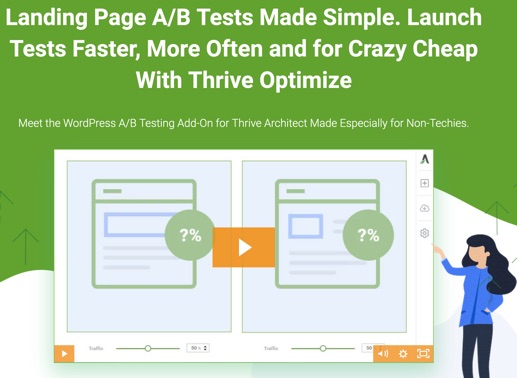
Thrive Optimize is another A/B testing option for WordPress—but is suitable only if your WordPress site has been built using the visual page builder tool, Thrive Architect.
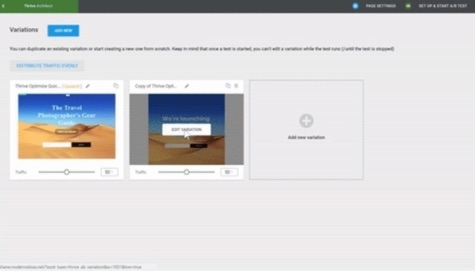
Using it requires just three main steps as follows (images below are adapted from their website):
- From within your WordPress dashboard, create a variation of an existing page via the Thrive Optimize tool.
- Pick a conversion goal.
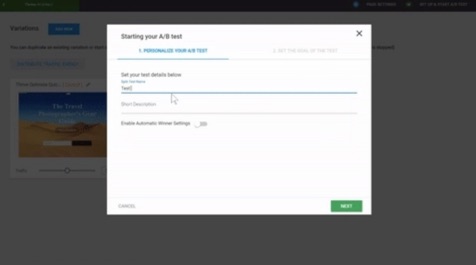
- Start the test.
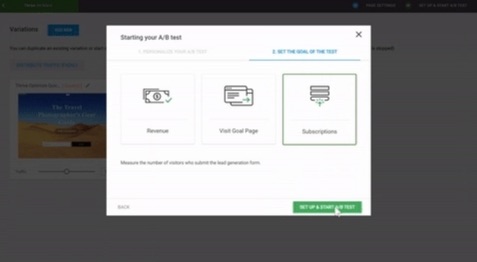
So as you can see, pretty simple. But again, only available if you’re already using Thrive Architect.
Here are some of the features the testing plugin gives you:
- Run as many tests as you like.
- Choose from three different conversion goals: page visit, opt-in form submission, or revenue.
- Customize the traffic distribution between variations as needed.
- Detailed reports on test performance.
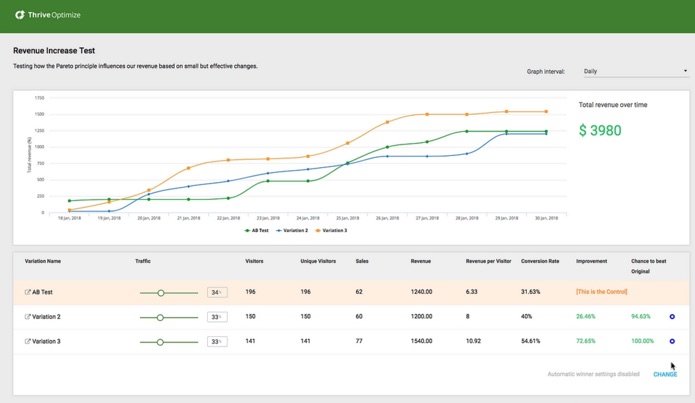
- Automatic calculation of when statistical significance has been achieved and a winner can be declared.
- The ability to “set and forget”, where a winner is chosen and applied for you.
There’s also only a one-time fee (USD$97 at the time of writing) to add to your existing Thrive Architect site, rather than the subscription model that most testing tools use.
5. Split Test Plugin for Elementor

Finally, the Split Test Plugin for Elementor lets you A/B test again from within WordPress, but (as you’ve no doubt guessed) only if your website has been built with Elementor.
It’s well maintained and has a near 5-star rating on WordPress, but note that it’s been built independently rather than by the same team behind Elementor.
Usage requires a yearly payment starting at USD$47 at the time of writing.
To set up a test, while building a page with Elementor, you can opt to test a specific element from within the Elementor tool.
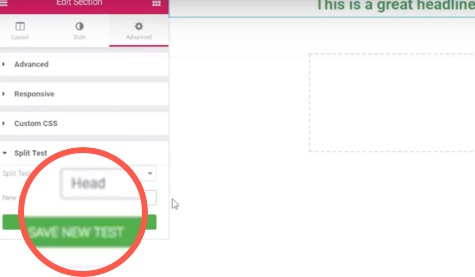
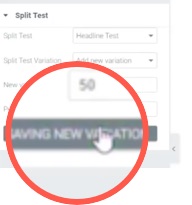
After clicking to save a new test, you then create and save a variation of that element.
For measuring the conversion, you then choose your conversion page for the test, and add some conversion code to that page via Elementor.
The tests you have running will show on the page for the plugin within your WordPress dashboard.

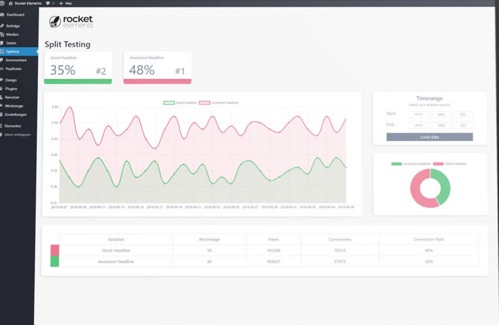
It’s not as sophisticated as the other tools above, but is a potential option for basic split testing if your site uses Elementor.
Frequently Asked Questions
What is A/B testing?
A/B testing is where you compare two versions of a marketing piece to determine which performs better.
How can A/B testing help me double results?
Conduct a couple of tests with 30% improvements and another with 20% improvement to see a doubling of results.
What tools can I use for A/B testing on WordPress?
Google Optimize, VWO, and Nelio AB Testing are popular tools for A/B testing on WordPress.
To Conclude
So now you know exactly how to approach A/B testing on WordPress-based websites, with a variety of different tools, including the top WordPress-specific split test plugins.
Which one you choose to use depends on factors such as the nature of your website, your budget, what you’re hoping to achieve, and the level of technical expertise in your team.
